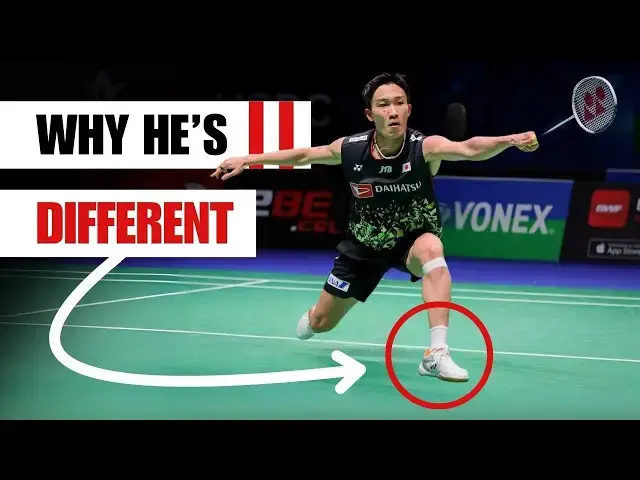
0:00
Kento Mimoda is an all-time great
0:02
badminton men's singles player who had
0:04
one of the most fluid and effortless
0:06
movements on court. He's definitely one
0:08
of the best players to study to get
0:10
better at footwork. In this video, we
0:13
want to take a closer look at Kento
0:14
Mamot's footwork. More specifically, his
0:17
transitional footwork, aka the footwork
0:20
after his recovery, but before his
0:22
movement to the shuttle. Transitional
0:24
footwork or a transition step between
0:27
the recovery footwork and movement to
0:29
the next shot is crucial to having
0:31
smooth movement on the court. It's
0:33
easier to show an example than to
0:35
explain it. Here's an example of what we
0:36
mean by Mamot's transitional footwork.
0:39
In this rally, notice how Mamot's left
0:42
foot moves in front after he plays the
0:43
straight forehand block.
0:50
This movement is essentially an
0:52
anticipation for these two corners
0:54
highlighted on the screen. And this is
0:56
what we mean by transition footwork. It
0:59
is a small oneep or twostep adjustment
1:01
between the recovery footwork and the
1:03
footwork towards the next shot. That
1:05
makes the transition between the
1:07
recovery and footwork towards the next
1:16
To avoid a long and tedious video, we
1:19
will not be breaking down how Mimoda
1:21
moves in all situations considered. But
1:24
we will be breaking down his footwork in
1:26
three of his arguably most played shot
1:28
categories and look at how he moves in
1:31
various situations and how he
1:33
transitions from one shot to another.
1:41
One of Mamot's greatest strengths that
1:43
doesn't really get the attention it
1:44
deserves is his ability to neutralize
1:46
aggressive and fast pushes from his
1:49
While half of this is the shot quality,
1:52
the other half is the type of movement
1:54
based off of the shot played. For
1:56
example, let's take a look at a straight
2:01
Generally speaking, after playing the
2:04
shot, Mimoto will take a small
2:06
repositioning shuffle back towards the
2:16
The purpose of this shuffle is to help
2:17
quickly push Mamoda out of the corner.
2:20
Then, as he performs his split step, he
2:23
will put his left foot in front to move
2:25
more fluidly to the net. This is the
2:27
transition footwork that allows Mimoda
2:30
to take the net early.
2:33
Mamot's crosscourt forehand slice
2:35
footwork is very similar to his straight
2:38
where Mimoto will perform the short and
2:40
quick shuffle and put his left foot
2:42
forward in anticipation of the net. This
2:45
is generally very intuitive for many
2:47
badminton players and is the transition
2:49
footwork that allows Mimoto to cover the
3:01
You can see in this clip that not only
3:03
is Mimoto able to cover the straight net
3:05
from his opponent, but he is also able
3:07
to jump out and attack the straight
3:21
It's also important to take into
3:22
consideration that Mamoto's recovery
3:24
footwork will match his shot speed. So,
3:28
if Mimoto plays a faster shot like a
3:31
drive or a punch clear that pushes the
3:34
pace of the game, Mamoto will look to
3:38
Now, another thing that is important to
3:41
take into consideration is where your
3:43
opponent is taking your shot. The beauty
3:46
of bad mitten is that many situations
3:48
will be similar, but none will be the
4:01
if you look at this clip where Mamota
4:04
drives straight on his forehand side,
4:07
you can see Mimoda adjusts his feet to
4:09
be side to side to better cover the
4:12
drive from Lie Chong Way because he
4:15
threatens many shot options by taking
4:17
the shuttle that high.
4:35
But if you take a look at this clip
4:38
where Mamot's opponent doesn't take his
4:40
drive as high, Mamoto will switch his
4:43
feet so his left foot is in front to be
4:46
in better position to take the net.
5:10
example of Mimoda adjusting and adapting
5:12
to different situations is keeping the
5:14
racket leg behind after playing the
5:16
straight or cross from his late
5:48
after Talking about Mamot's transition
5:50
steps from his late backcourt to his
5:51
other shots, we now need to look at how
5:53
Mamoto transitions from his front court
5:56
to his other shots. For Mamot's front
5:58
court, we will mainly talk about his
5:59
recovery on his pushes.
6:08
When he pushes straight, he will usually
6:10
walk or skip backwards depending on his
6:12
shot speed and how fast he needs to
6:39
Interestingly, most of the clips we
6:40
watched of Mamoa had him shuffling when
6:42
pushing cross on his forehand side and
6:44
walking back when pushing crosscourt on
6:52
An explanation for this is about being
6:54
in the optimal position for defense when
6:57
defending on your backhand side. The
7:00
general best position for defense in
7:01
singles is to have your non-rackcket leg
7:04
a little staggered behind your racket
7:06
leg to make it easier to turn quicker
7:08
for the fast straight shot. So when
7:12
Mamoto pushes crosscourt on his forehand
7:15
he recovers by shuffling.
7:18
This enables him to already be in a
7:20
backhand defense position without having
7:22
to change the positioning of his hips.
7:34
And just like we mentioned before, no
7:37
situation is exactly the same. And it is
7:40
important to note that Mamota may not
7:42
always return directly to the middle of
7:44
the court after every time he pushes. If
7:47
he sees that his opponent is taking the
7:48
shuttle late, he will edge up further.
7:52
But most of the time will stay side by
7:54
side in his feet positioning.
8:08
And depending on where he played his
8:10
push, he will cover more on that side.
8:12
This is to ensure that he is already
8:14
positioned for their fastest or most
8:34
After talking about Mimot's pushes a
8:36
little, it's only natural that we cover
8:38
his defense transition footwork after
8:40
it. Mimot's transition footwork from
8:42
defense will vary depending on the shot
8:44
quality of his defense and what he wants
8:52
For example, in this clip, after Mamoto
8:55
blocks Shiuchi's straight smash, he
8:57
keeps his feet side by side.
9:03
The reason for this is simply because of
9:05
his defense quality. And where Shiuchi
9:07
is taking the shuttle, because she is
9:09
approaching the net with his racket face
9:10
up, he threatens Mimoda because he can
9:19
And in cases where Mimo's opponents are
9:22
not immediately threatening a drive, you
9:25
can see Mimoto block and actually shift
9:28
his left foot in front of his body.
9:31
Doing this allows him to take a more
9:33
aggressive stance because he can move
9:35
more quickly to the front and the back.
9:37
And this is simply because he sees his
9:38
opponent take his follow-up block with a
9:41
flat racket face and lower approach,
9:43
which means the shot generally has to
9:45
come up. When you see your opponents
9:47
take the shuttle with a flat racket
9:49
face, they will likely push or net. So,
9:52
there is no need to prepare for the
10:35
To summarize, transition footwork is
10:38
exactly what the name implies. It's the
10:40
footwork in between the shots you play
10:43
that will smoothly get you from one
10:45
corner to another. Many top players with
10:47
great footwork, such as Kento Mimoda,
10:49
have mastered transition footwork.
10:51
Transition footwork is what truly makes
10:53
one's footwork smooth and efficient and
10:55
something we should definitely pay
10:57
attention to when practicing our
10:59
footwork. Who do you think had the best
11:01
movement on the court of all time? Let
11:02
us know in the comments below. And don't
11:05
forget to comment what you want to see
11:06
next. If you guys like this video, make
11:08
sure to hit the like and subscribe
11:10
button. And as always, thanks for